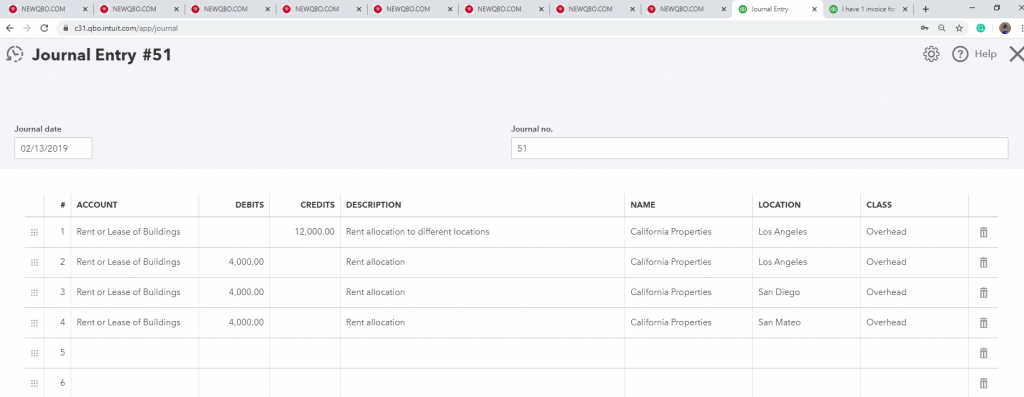
If you need to split a transaction in QuickBooks Online among several properties, then you can not do it easily in QuickBooks. Yes, here Accountwizy is here with a new topic to split a transaction in QuickBooks Online. Connect with us, and read the blog carefully, till the end for a smooth procedure.
Before starting the blog, it will be good to get the details about this topic. So let’s start:
You can only have one location on a transaction because the location is tied into the “source” of the transaction, rather than the target. A source is something like the bank account that it was paid from. The targets would be the expense accounts in the split detail part of the transactions. So here is today’s topic, we have discussed how to enter a split transaction in QuickBooks Online in front of you. If you want to know how to do it, then connect with us to the last of the article.
You can split expenses between multiple accounts to maintain the organization in your accounting records. If you need to pass on the expense to the seller to your customer, you can split the expense through the accounts receivable account to your customer. Split transactions are created in the register of expense accounts. You can spread expenses across two or more QuickBooks accounts.
Other Recommended Articles:
How To Merge Accounts In Quickbooks?
How to set up sales tax in quickbooks online
Import Accountant Changes in QuickBooks 2020 (Restore the Accountant’s Copy)

Steps to Record Multiple Accounts in a Transaction
When the user didn’t enter the transaction yet, then it’s best to open the Invoice, Bill, etc., and also best to associate multiple accounts. Here below the details:-
- Click “Lists,” “Charts of Accounts” and then double-click the name of the account register that you want to view.
- And then find the account for the transaction.
- Then, go under the Action column, and then click on the option of View register.
- Select the transaction, and then click on the option of Edit. The entry screen for that particular transaction opens.
- After that, you need to enter the other accounts to add with the amount. Note:- The amounts for each account should add up to the total amount of the transaction.
- And at the last, click on the Save option. And then the transaction now displays Split in the account column.
Once you have split a transaction, the Split icon will show in the transactions tab next to the Category column.
If you want to like revert a split transaction, then follow these given steps below:
- First, you need to locate the split transaction that you’d like to revert.
- Then, go to the Edit option to edit the details, and navigate to the Split button again.
- Click on the ‘x’ next to the split transaction itself to revert the split.
- Make any other necessary changes (such as changing the amount back to the original amount).
- At last, click I’m Done to save the changes.
The End Line
Hope this article will help you to learn how to split a transaction in QuickBooks Online. You just need to follow the above steps carefully to perform the procedure successfully. If in case, you need ProAdvisor support to perform this activity then you can get our Accountwizy service to fix your problem at any time and anywhere. Don’t hesitate to connect with us, we are always with you to help you.
