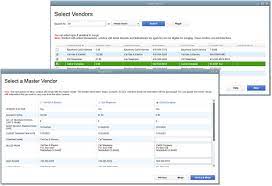
Are you worried to merge duplicate vendors in QuickBooks Desktop? Don’t worry you can merge duplicate vendors in QuickBooks Desktop easily because, here in this blog, you will get the best and innovative solutions to perform this activity.
Many professionals and business owners who adopted QuickBooks are now confused with respect to merging Duplicate vendors in QuickBooks Desktop(is it possible in it?). QuickBooks Desktop Enterprise and Accountant 2018 and later versions, allow you a facility of merging duplicate vendors in QuickBooks Desktop quickly. You can do this through the new merge duplicate vendors feature allows you to easily combine up to 4 vendors, consolidate transactions to a master vendor and update information whenever it requires
Why Merging of Duplicate Vendors in QuickBooks Desktop is So Important
This feature provides facilities in which you can consolidate all the transactions without entering them again and again at regular time intervals. The feature assures you, a new place for re-assigning the data to the new one, which you will get by deleting the data of one vendor. When you start processing, always remember in mind that the process can never be reversed, deletion and transfer is permanent.

Before Merging Duplicate Vendors in QuickBooks Desktop, a few points need to be clear.
- You need to create a Secure Backup of your Files
- The file name is changed to “Single User Mode”
- Make sure there are no pending accountant charges
- Multi-currency needs to be switched off
- .QBA file should not be used
- Check the details of the vendor either it does not come under tax exempted, direct deposit vendors, or authorities.
- Always remember that it is the only way to undo a merge is to restore the backup of your file
- Ensure that you cannot merge Duplicate Vendors paid through
- Online Banking Vendors
- Tax Authorities
- Direct Deposit vendors
Learn step by step guide to know the complete process of merging Duplicate vendors in QuickBooks Desktop.
Other Recommended Articles:
Get the Easy Solution to Fix Quickbooks Error 6000 77
QuickBooks Error 3003 : Best Solution to fix this error
Refund Receipt For QuickBooks Online users
Procedures to Merge Duplicate Vendors in QuickBooks Desktop
Here we have provided the procedure according to the QuickBooks Desktop version, just choose your version and follow the steps carefully.
Steps to Merge Vendors in QuickBooks Desktop 2019
- Begin with Acess Merge Vendors Window:
For the users who work on QB Desktop Accountant Edition: From the Accountant Menu, Client Data Review>>Merge Vendors
For the users who work on QB Desktop Accountant Edition: From the Company Menu, Accounting Tools>>Merge vendors
- From the Merge Vendors Window, Choose the vendors to be merged, then hit “Next”
- Choose “Master Vendor” Then select “Merge”
- On the Confirmation Prompt simply select “Yes”. In the same way select “OK” on the Merge Complete Window
Steps to Merge Vendors in QuickBooks Desktop 2018
If you work on QuickBooks Desktop, then the steps to merge Vendors in QuickBooks Desktop 2018 are different from the steps taken for merging Vendors in QuickBooks Desktop 2019. Users who work on QuickBooks Accountant Version and QB Enterprise V18 and all versions have separate ways to merge duplicate vendors. It has the ability to merge one vendor into another vendor, it represents a new way to search, sort, and compare vendors that need to be merged together.
In the same time interval, you can merge up to 4 vendors by using this tool. This feature can be very helpful in most cases, you can choose specified vendors for merging, all vendors are not eligible for it.
Let us take an example to provide you with great understanding.
- You are not eligible to merge vendors with transactions posted through Direct deposits and Bank Feeds.
- You cannot merge vendors that are Sales Tax(non-US versions VAT Tax agencies).
A limitation associated with QuickBooks Files is to use Multi-Currency. To use this feature:
- Choose the Master Vendor you want to retain in QuickBooks Desktop. And then Select up to three vendors, you want to merge into your Master Vendor.
- Now Pick the actual data and information from the other vendors you are willing to retain and migrate into your Master Vendor.
- QuickBooks helps you in the Backup of your Company File prior to the actual merger taking place.
- QuickBooks will proceed with migrating any of the identification details chosen from the other vendors into the Master Vendor
- In the Conclusion, QuickBooks displays a pop up on the screen confirming “Merge Complete” reminding your location of the Backup file made prior to merging the vendors.
The Merge Duplicate Vendors in QuickBooks Desktop feature is designed for Accountants and Proadvisors to provide more options and better control over the merge process for duplicate vendors, you have additional uses for this functionality.
Steps for QuickBooks Desktop 2018 and Below
- Choose the Vendors menu and select Vendor center(Vendor>>Vendor Center)
- Copy the name of the vendor, that you want to use in the future
- Write the name of the vendor which you want to merge then choose Edit Vendor by right-clicking on it
- Once it has done you have to change the name of the vendor.
- Click the “Cancel” option to return to “Vendor Center”
- Replace the existing one to the new one or copied one and then hit “Ok”
- A prompt will appear on the screen, Choose “Yes” to proceed with the merge
Final Note
We hope, after reading the article all your queries are instantly fixed but if you still have some issues or you need help to complete the procedure to merge duplicate vendors in QuickBooks Desktop 2019, 2018, and below 2018 versions, you can contact Proadvisors Support through our toll-free number +1-844-405-0904 at any time and anywhere.
